MacOS/IOS swift项目调用Rust库
本文主题是IOS使用Rust库。其实C/C++库操作类似,本文前半部分我将描述怎么把Rust library编译为静态/动态连接库,后半部分是怎么使用这个库。
同样的,Rust编译的库同样适用于其他平台的项目比如Android、MSVC等。
一、准备工作
我假设你已经有Xcode和Rust环境,那么还需要:
- 目标平台Rust工具链
- C/C++ 头文件生成器
- IOS库编译工具
1 | rustup target add x86_64-apple-ios aarch64-apple-ios |
1 |
|
二、制作FFI静态库
为什么要静态链接?IOS对依赖库限制比较多,其他平台需要解决依赖关系,但如果你的App不是对构建物大小有限制的话这就是不是问题,当然这也不是本篇讨论的重点。
下面我们以开源项目google-authenticator-rust为例子。
1.编写导出C风格函数
1 | // 返回C风格字符串 |
#[no_mangle]控制编译器 不要破坏C函数名,确保外部能通过create_secret调用到这个函数。#[cfg(feature = "clib")]条件编译参数,编译库时通过增加features参数确定是否编译为C/C++库。
2.编写Rust内存释放相关代码
1 | /// # Safety |
3.导出C/C++ Header
这个需要注意的是,默认导出的C Header file, 需要C++ header,需要配置cbindgen.tmol
1 |
|
4. 编译静态库
配置Cargo.toml
1 | #修改[lib] |
1 | # 这里需要说明的是,feature 可以根据需要增减targets, 案例中增加x86完全是为了在x86平台调试 |
#当然可以把x86和arm64两个平台库合并为一个库
1 | lipo -create target/x86_64-apple-ios/release/authenticator.lib \ |
至此已经编译好库文件,如果你是Apple生态项目大拿或者只需要知道怎么编译Rust库就可以忽略以下内容。
下面我们将通过一个MacOS App案例介绍怎么使用静态库。
三、IOS/Mac Project 使用C库
这个案例以Swift项目为例,一步一步介绍如何使用C library
1. 添加C Library到项目
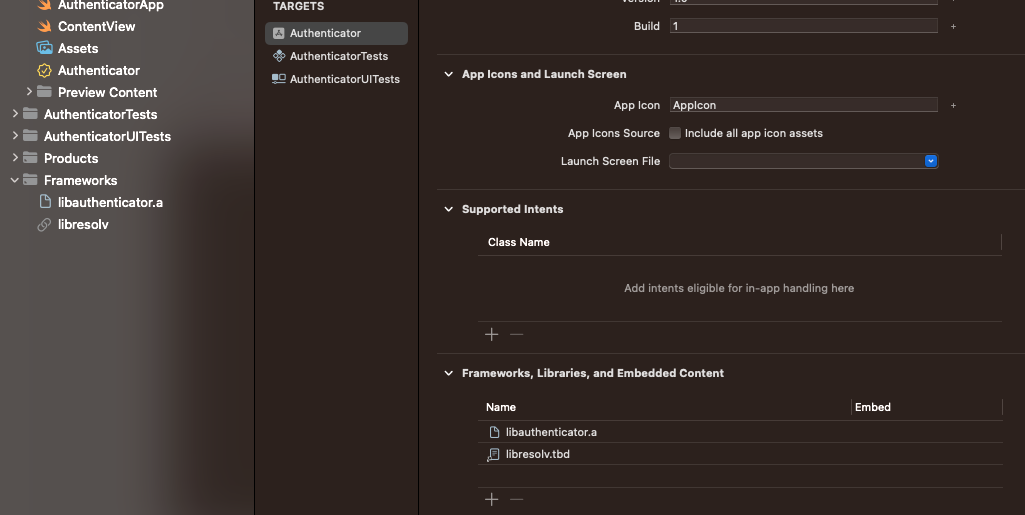
可以拖动刚才编译好的libauthenticator.a到项目,在General->Frameworks,Libraries…->Add Other添加。
添加libresolv.tdb到项目,可以直接在 General->Frameworks,Libraries...中搜索到。

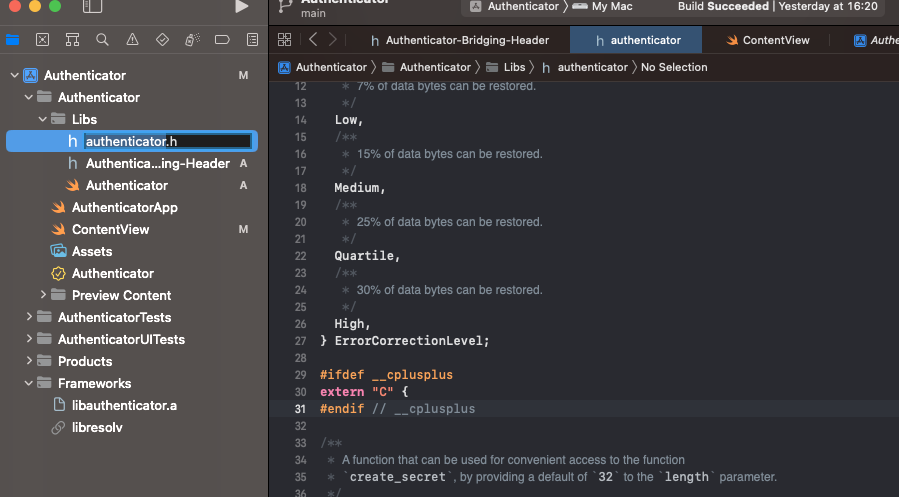
2. 添加C Header到项目
xcode Add Files To '{project}'

3. 编写Objective-C Bridge Header
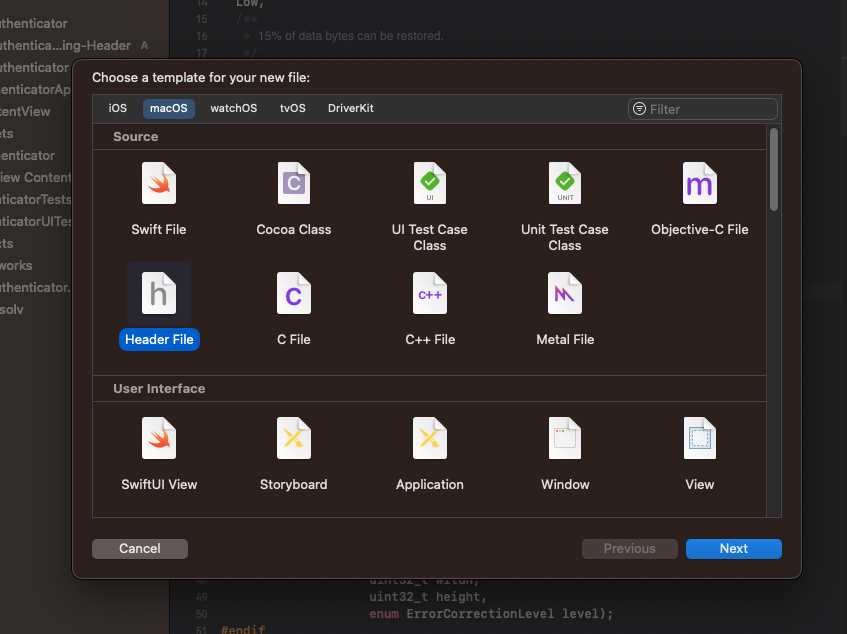
xcode File -> New -> File..., 选择Header File并命名为 Authenticator-Bridging-Header.h。

4. 配置项目路径
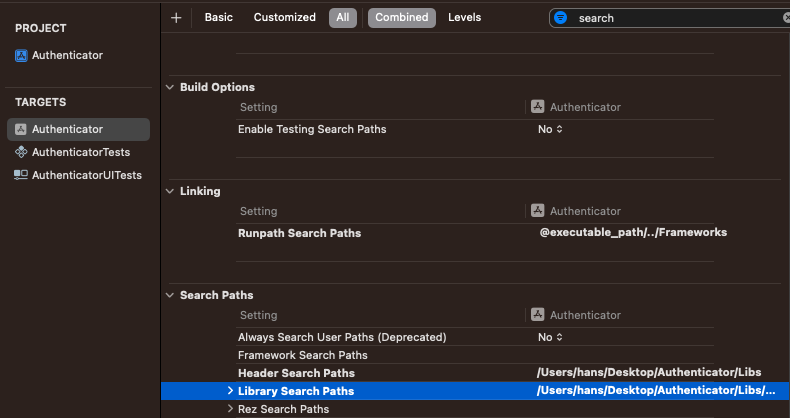
xcode TARGETS Authenticator, Build Setting
Objective-C Bridging Header增加 $(PROJECT_DIR)/Authenticator/Authenticator-Bridging-Header.h
Search Paths -> Header Search Paths 增加 $(PROJECT_DIR)/AuthenticatorSearch Paths -> Library Search Paths 增加 $(PROJECT_DIR)/Authenticator
修改为如下,请注意修改自己的目录

5. OC Bridging Header 引入C header
1 |
5. 编写swift调用类
注意这里有个要点,Rust返回的字符串需要归还Rust释放内存,其他语言同理。
free_str(UnsafeMutablePointer(mutating: encodeCode))
1 |
|
至此,Swift项目调用Rust库已经配置完成。如果配置过程中遇到问题或者其他有疑惑的地方可以参照项目
更多参照